Are you looking to elevate your website’s user experience and streamline lead generation effortlessly with FormFlow Plugin? Look no further than FormFlow – the Simple Intuitive Drag & Drop Form Builder with Advanced Lead Magic. With its new Contact Form 7 (CF7) integration feature, customizing and managing forms has never been easier. In this guide, we’ll walk you through the simple steps of installing and configuring the FormFlow to unlock its full potential.
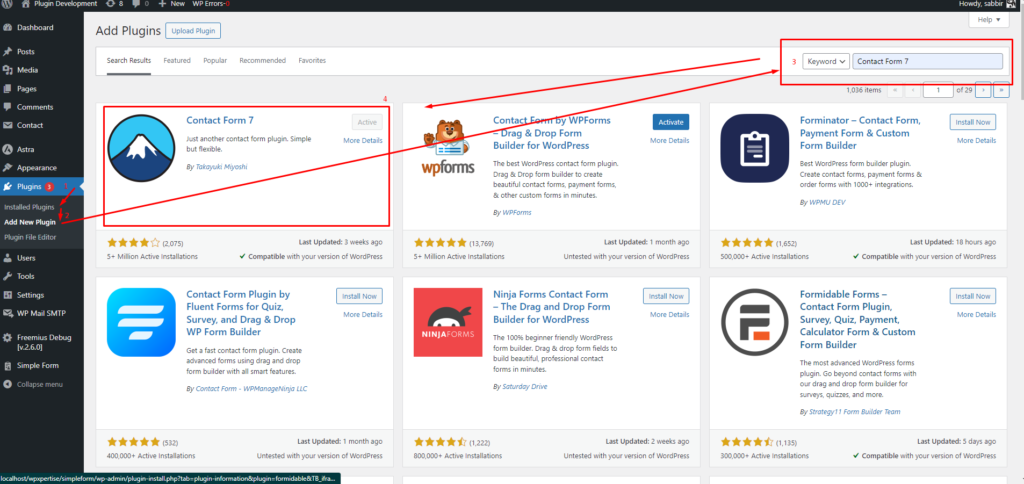
Alternatively, you can streamline the process even further by directly installing the plugin from the “Simple Form Plugin” settings page. Within the CF7 tab, you’ll find an option to install and activate the plugin with a single click. Once activated, you’ll be ready to explore the wealth of features FormFlow has to offer.
Enabling Contact Form 7 as Floating Widgets
If you wish to showcase your Contact Form 7 forms as floating widgets on your website, simply follow these additional steps:
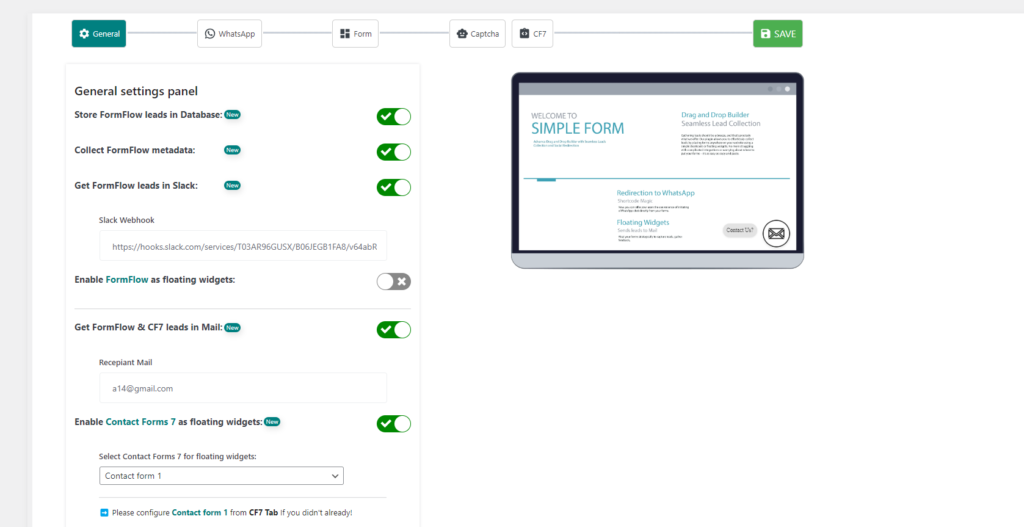
Go to “Settings” > “General.”
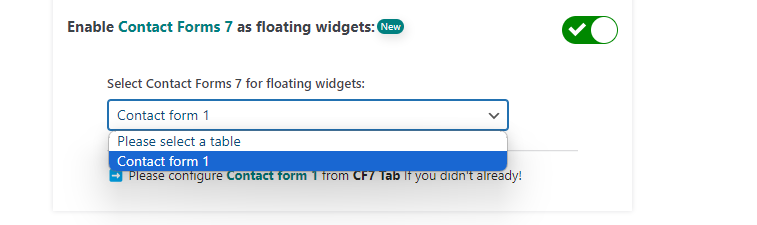
Enable “Contact Forms 7 as floating widgets.” now simply choose CF7 forms from” Select Contact Forms 7 for floating widgets” dropdown list.
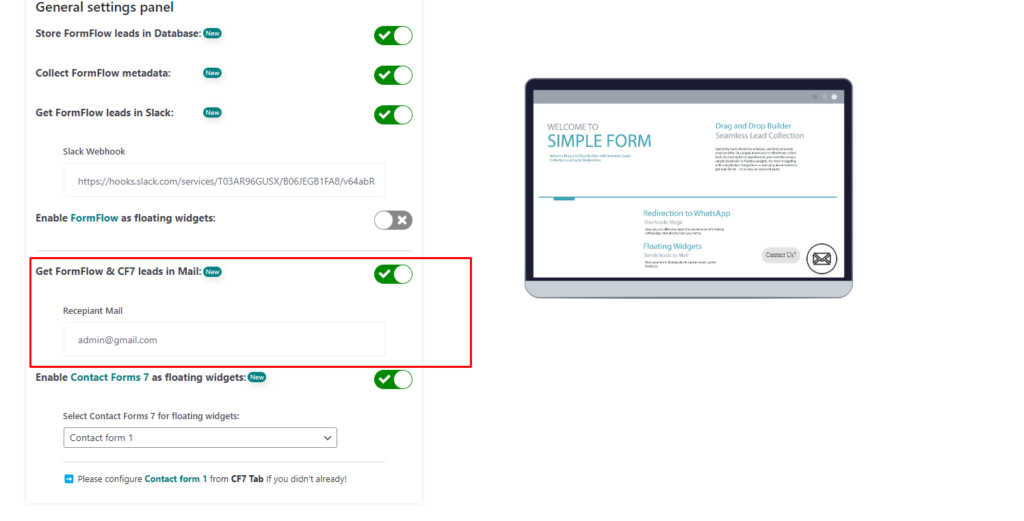
This feature adds a touch of interactivity to your website, making it easier for visitors to engage with your forms. Additionally, by activating “CF7 leads in Mail,” you can effortlessly collect leads directly into your mailbox, streamlining your lead management process.
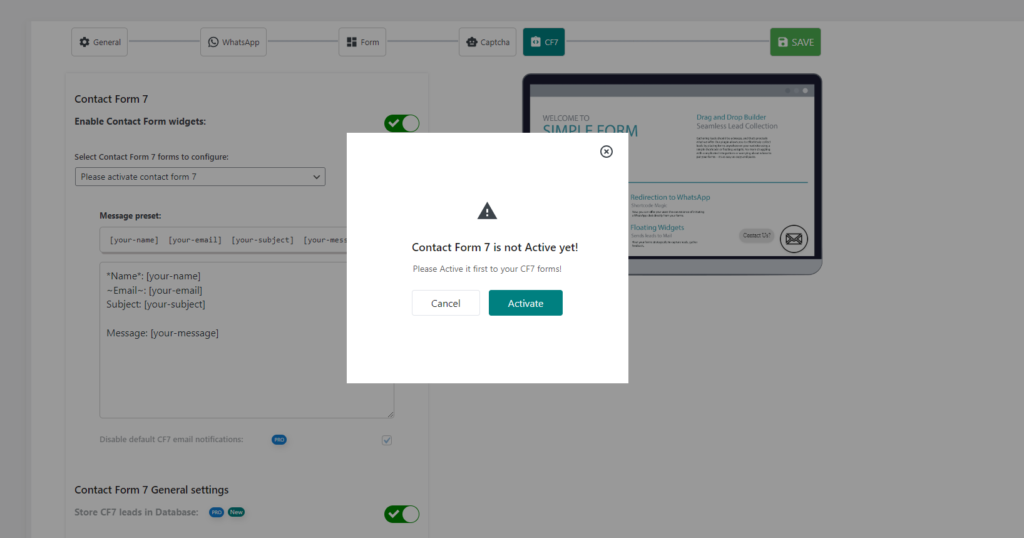
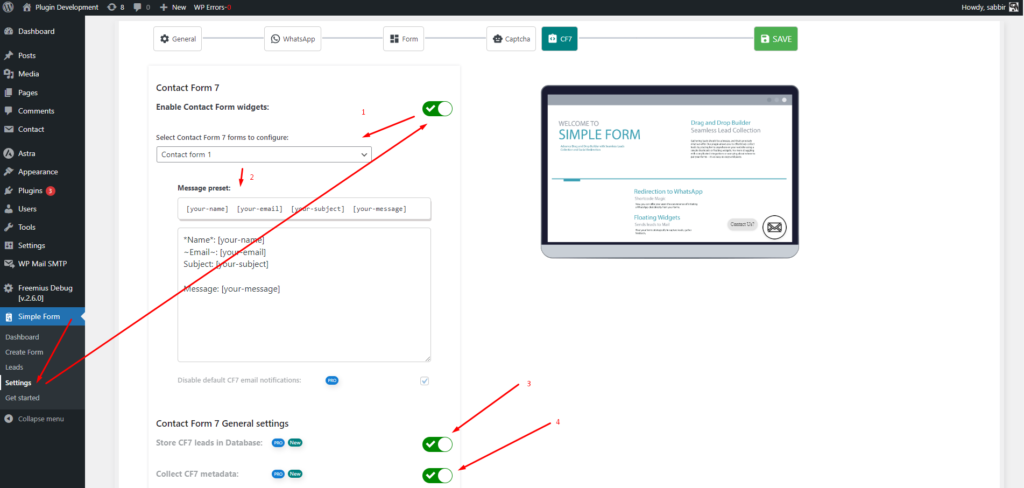
You need to configure Contact Forms 7 (CF7) from CF7 tabs
Go to “Settings” > “CF7.”
Enable “Enable Contact Form widgets.” now simply choose CF7 forms from” Select Contact Form 7 forms to configure” dropdown list.
Set the preset message
Enable/Disable default CF7 email notifications
Choose “Contact Form 7 General settings”
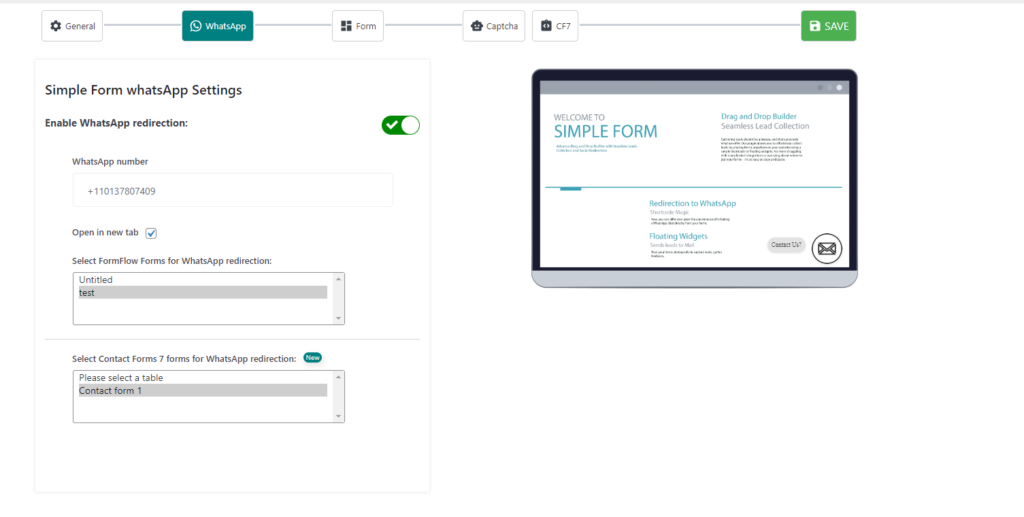
Configuring WhatsApp Redirection
Another exciting feature offered by FormFlow is the ability to redirect users to WhatsApp for seamless communication. Here’s how to set it up:
Visit the WhatsApp tab within the plugin settings.
Activate “Simple Form WhatsApp Settings.”
Select the Contact Forms 7 forms for WhatsApp redirection.
Add your WhatsApp number.
Choose redirection from “Open in new tab”
Finally select CF7 Forms “Select Contact Forms 7 forms for WhatsApp redirection”
With this configuration in place, users can effortlessly connect with you via WhatsApp directly from your forms, enhancing user engagement and fostering stronger connections.
How to use FormFlow with Contact Form 7
conclusion
In conclusion, FormFlow revolutionizes form creation and lead generation on your website with its intuitive interface and advanced features. By following the simple installation and configuration steps outlined in this guide, you can harness the full potential of the plugin, maximizing user engagement and driving conversions. Elevate your website’s forms today with FormFlow and unlock a world of possibilities.


0 comments